
Everything you need to set up a Site Induction for your Site
Both Site Managers and Company Administrators can create and set Site Induction Forms.
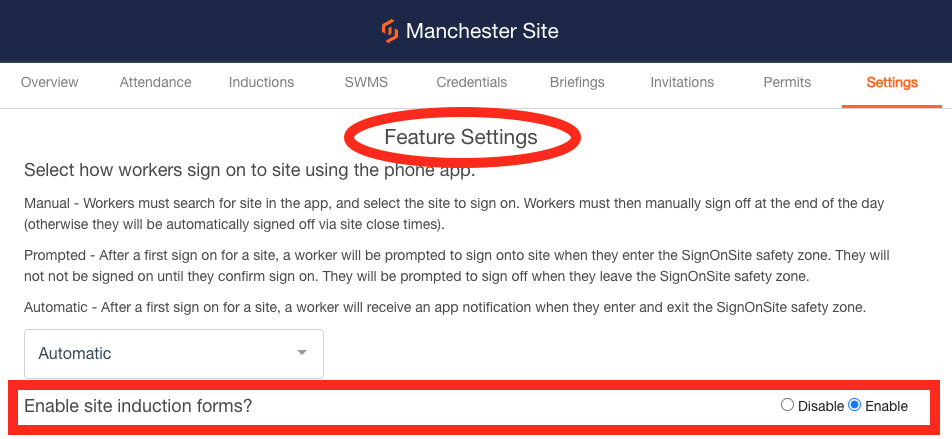
Ensure the inductions are set to enabled. This is done by going to site settings in the web panel and clicking Enable Inductions
With a Site Induction active on your site, you have a new level of visibility over your site's compliance. You can see who's on-site, which people still need to complete an induction, and keep all your paperwork safe and accessible in the cloud.
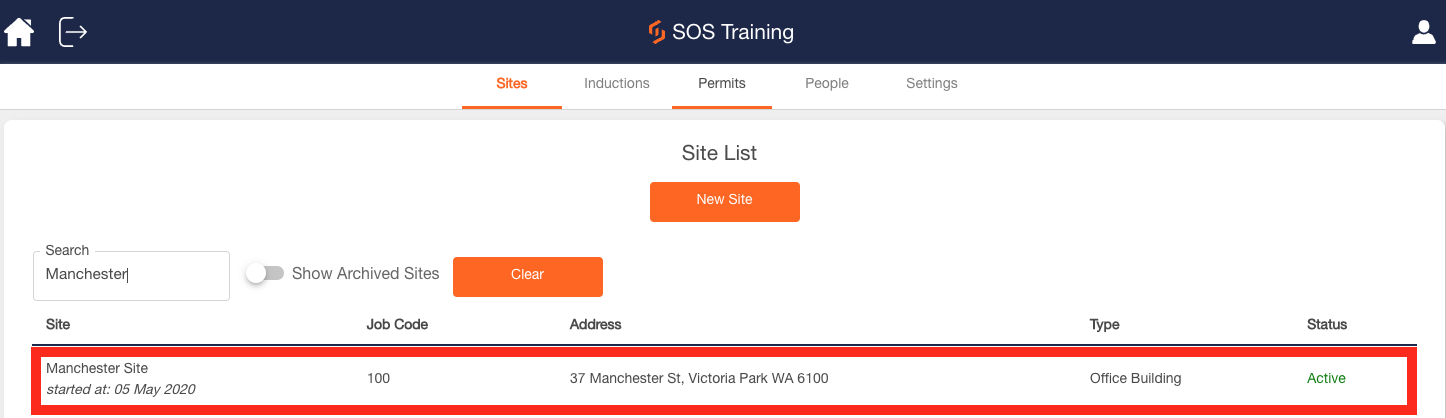
1. Navigate to the site you want to set your induction for through the Manager's Panel.
You can do this by searching for your site on the Dashboard.
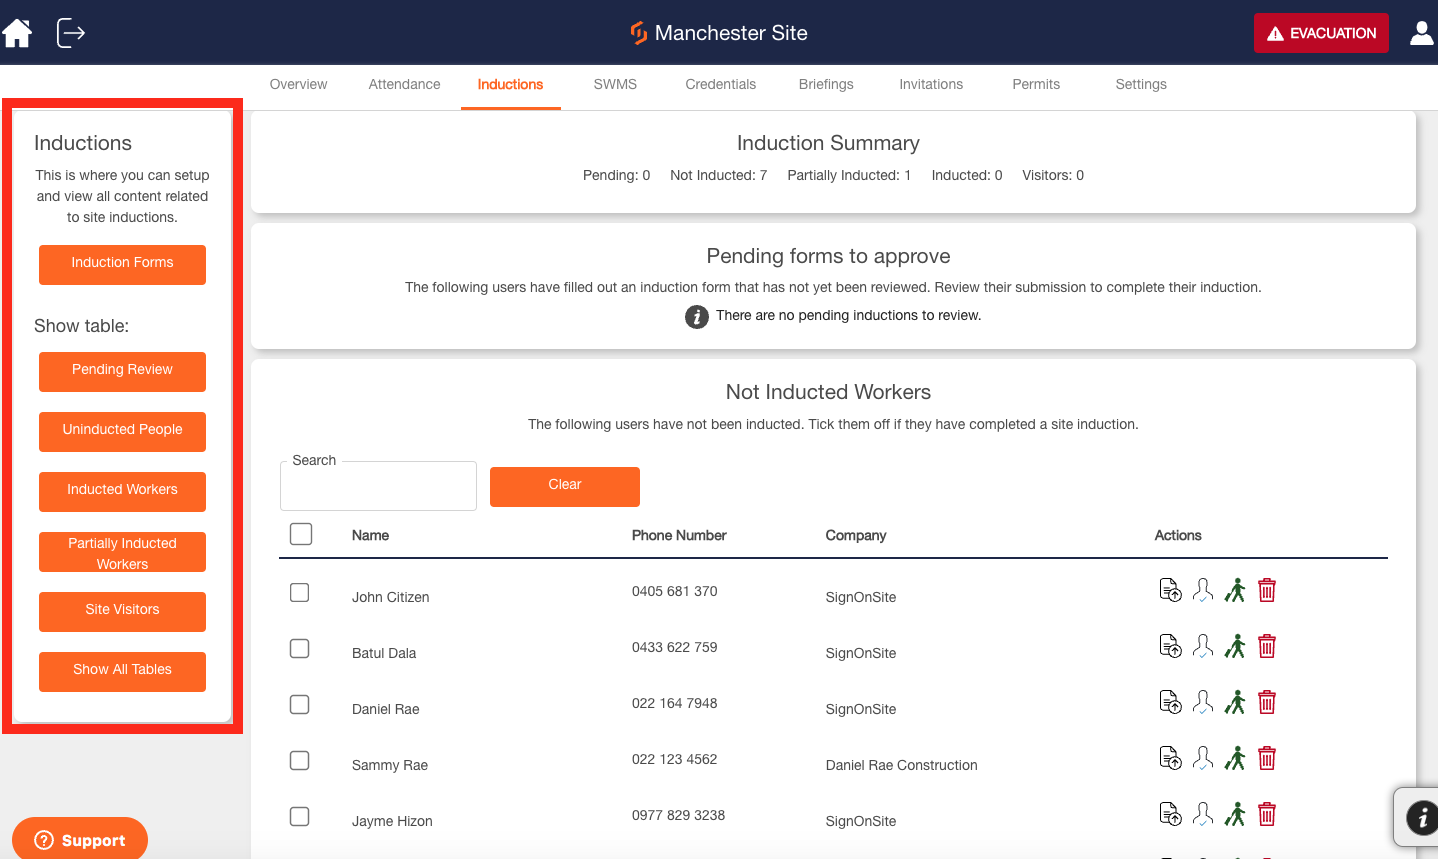
2. Navigate to the Inductions Register of your site. Click the Induction Forms button on the left.
Note: If your window doesn't have this button, then your company may not have inductions enabled. Talk to your Company Admin, or drop us an email yourself to get it enabled.
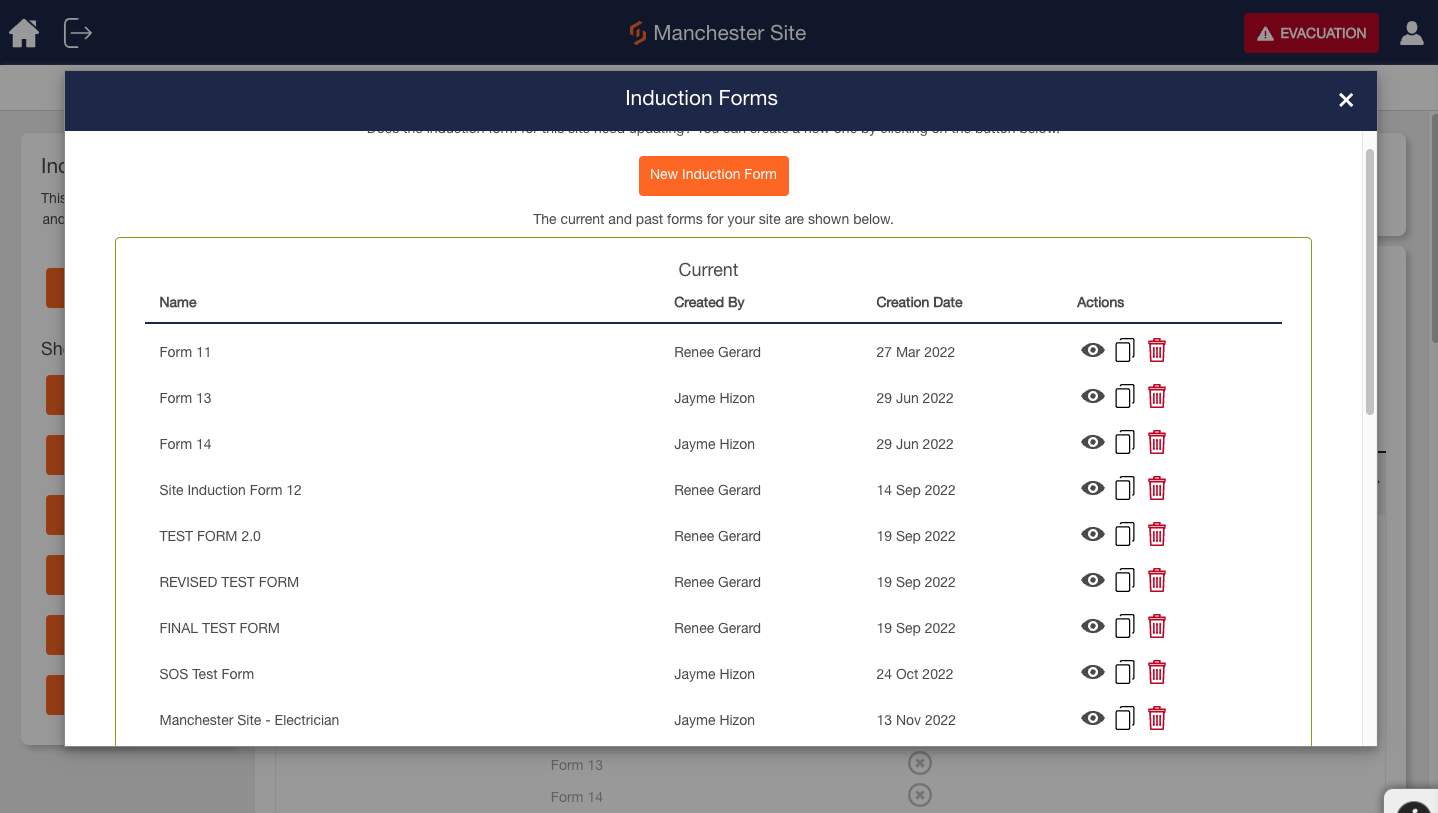
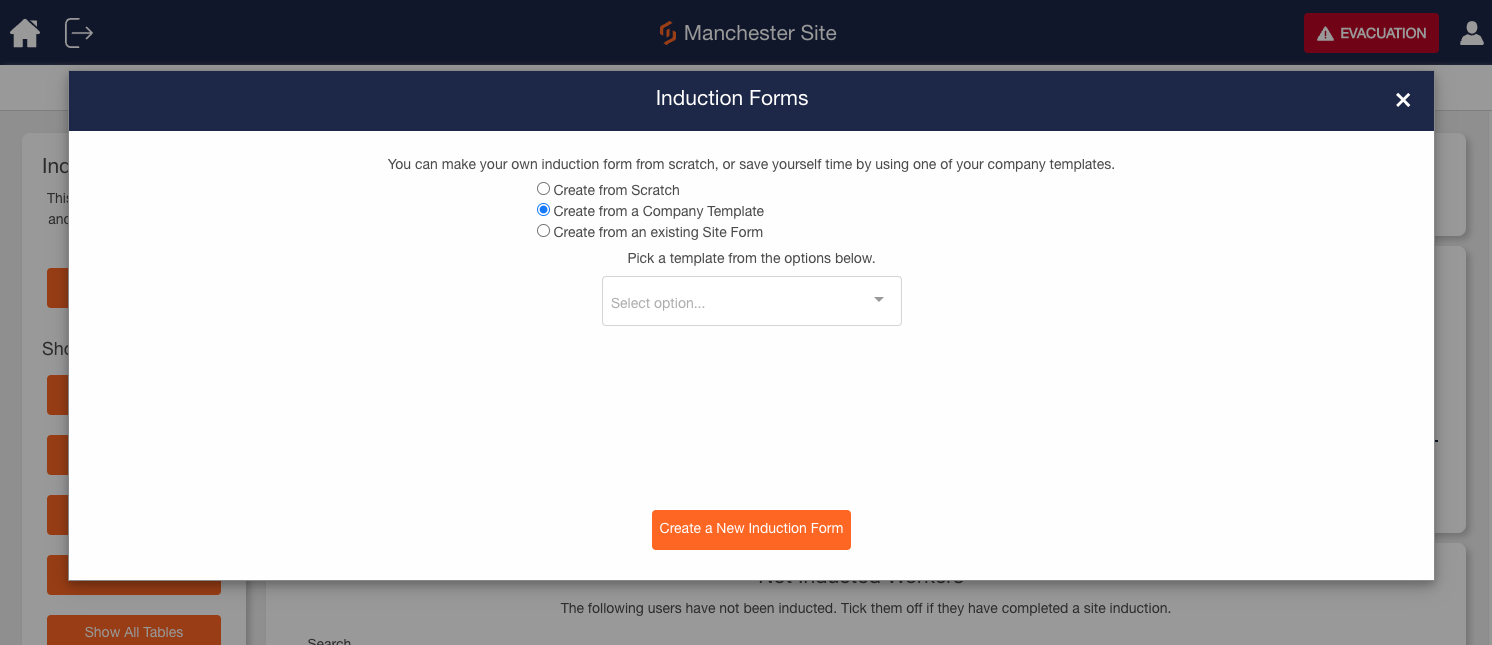
3. This popup will appear.
The Current section shows the Induction Forms that's currently active for users on your site (if you or someone else has already set a form). Once a form is active, you won't be able to change it.
To make a modified version, click the copy button, edit the copy, and then set it as active when you're done.
The Draft section is where incomplete forms will appear. If you copy a form or create a new form, it will sit here until it has been activated. You can set these forms as active, view them, edit them, or delete them using the icons under the Actions column.
The History section is where your old active forms are stored. This lets you see the history of the Induction forms you've had on site. You can restore an old version as the active form, view the old form, or delete it.
To start a new induction form, head to your Site Induction Register and click on New Induction Form
4. Once you click New Induction Form, this box will appear. If you're starting from scratch, then select the top option and click Create New Form.
It's worth checking if your Company Administrators have given you a template to work with; if so, choose to Create from a Company Template.
Lastly, if you already have existing site forms you'd like to modify, then choose to Create from an existing Site Form.
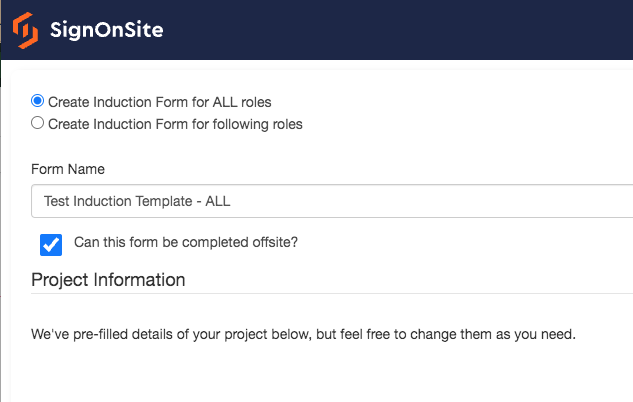
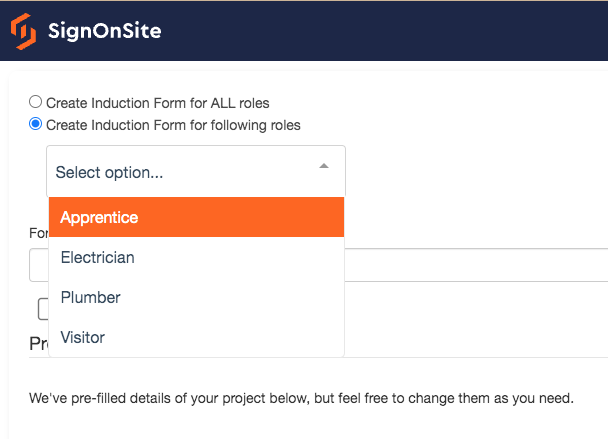
5. You'll be taken to the form wizard. Create your form as you'd like.
Inside the Induction Form, you have the option to:
-
Create an Induction Form for ALL roles
-
Create an Induction Form for specific roles
Note: You also have the option to allow the Induction form to be completed offsite.
Here are a few handy tips:
-
The Add button in each section is to add more information, not to save what you have just entered. If you hit this by accident, you can remove it by clicking the red Remove button.
-
The project information fields will be automatically filled out on each site (taken from the information you first inputted when creating the site).
-
Most basic worker information can be added using the worker's Personal Details section.
-
You are able to ask if workers are apprentices by ticking the Apprentice Status box
-
Your workers can electronically sign their induction by ticking the Electronic Signature box.
-
You are able to ask for a worker's indigenous status by ticking the Indigenous Status box (please note this is available for Australian companies only).
-
Upload documents or images you want your users to see in the Include Images for Workers to Review. You can upload as many documents and images as you need; however, the files must be smaller than 9 MB.
-
Use the Worker Acknowledgements section for items and rules you want your users to individually acknowledge.
-
The licenses and credentials section is where you can add the license to the list. This will allow you to specify any cards that you want workers to upload by checking this box and pressing Add on the left. You can also enable workers to upload any. licenses/competencies they may have by leaving the 'Custom Licenses' option enabled.
-
Use the multiple-choice Quiz Builder to test your worker's knowledge of their responsibilities and the rules of the site.
6. Hit "PUBLISH" to finish creating your form!
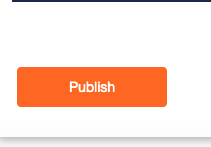
Note: If a section has been checked but there is no information supplied, the system will not allow the form to be submitted. Go back and make sure you've filled in all the fields you want to use or removed the unwanted sections.
7. Your induction form has been built. Congratulations!
Now you can activate it and get it out to the mobile phone app.
You'll be returned to the main Inductions screen. Click the Induction Forms button on the left again, and you will see your form in the Drafts box.
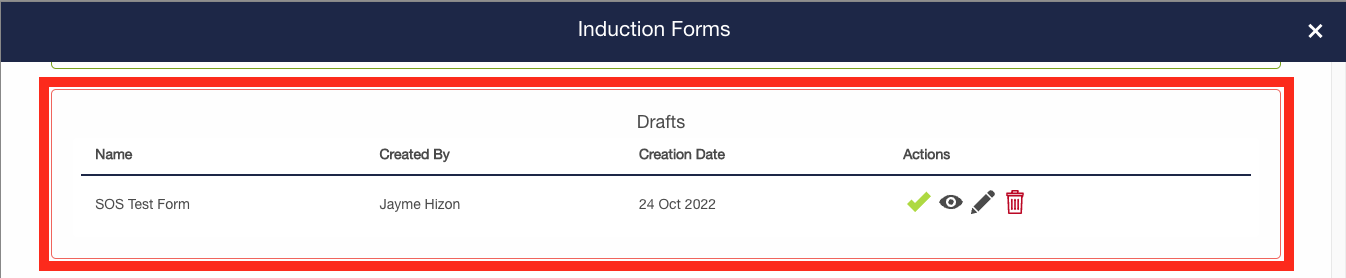
In the Drafts box, there is an Actions column with these icons:

When you're ready to activate the form and click Activate, you'll be presented with these options:
